I tend to take my time when it comes to decor. Some ideas come to me quickly and some take their sweet time. Our home now is substantially larger than the one we moved from 6 years ago. I didn’t have enough furniture and no way near enough decor to adequately decorate the house. Not to mention, new house, meant I was likely headed down a whole new road of design. Out with the old and in with the new! Instead of diving right in and filling every space the minute we moved in, we decided to take our time and make the right choices instead of the rash ones.

Our living room is often referred to as our “Christmas Tree Room.” It’s the front room in our home that you see as soon as you walk in, but it isn’t often used for much. Although this space spends much of it’s life unoccupied, I absolutely love it. It has vaulted ceilings, loads of natural light and it just feels welcoming to me. We call it the “Christmas Tree Room” because our living room shines during the holidays. It’s home to my 12′ tall Christmas tree, the gifts, the stockings, and all of the holiday cheer. We sit on the couch and floors on Christmas morning and make everlasting memories! That room lives it’s best life during the holidays.
Our living room has a large wall. Super large. One that was blank for a few years. I waffled with the idea of a large clock or some salvaged wood, but honestly, it was better blank than decorated haphazardly. I knew the idea would come to us eventually. Eventually is basically a bad word in my vocabulary. It’s one my husband used when I’d ask him if we’d get engaged to be married. He’d say, “eventually” and I took that as a ‘never.’ In this case, eventually was the right word to describe this space.
This wall needed something funky. Something old. Something unique. Kevin finally came up with the idea out of nowhere. He said, “what about some old windows?” Yes! Genuis! I loved the idea.
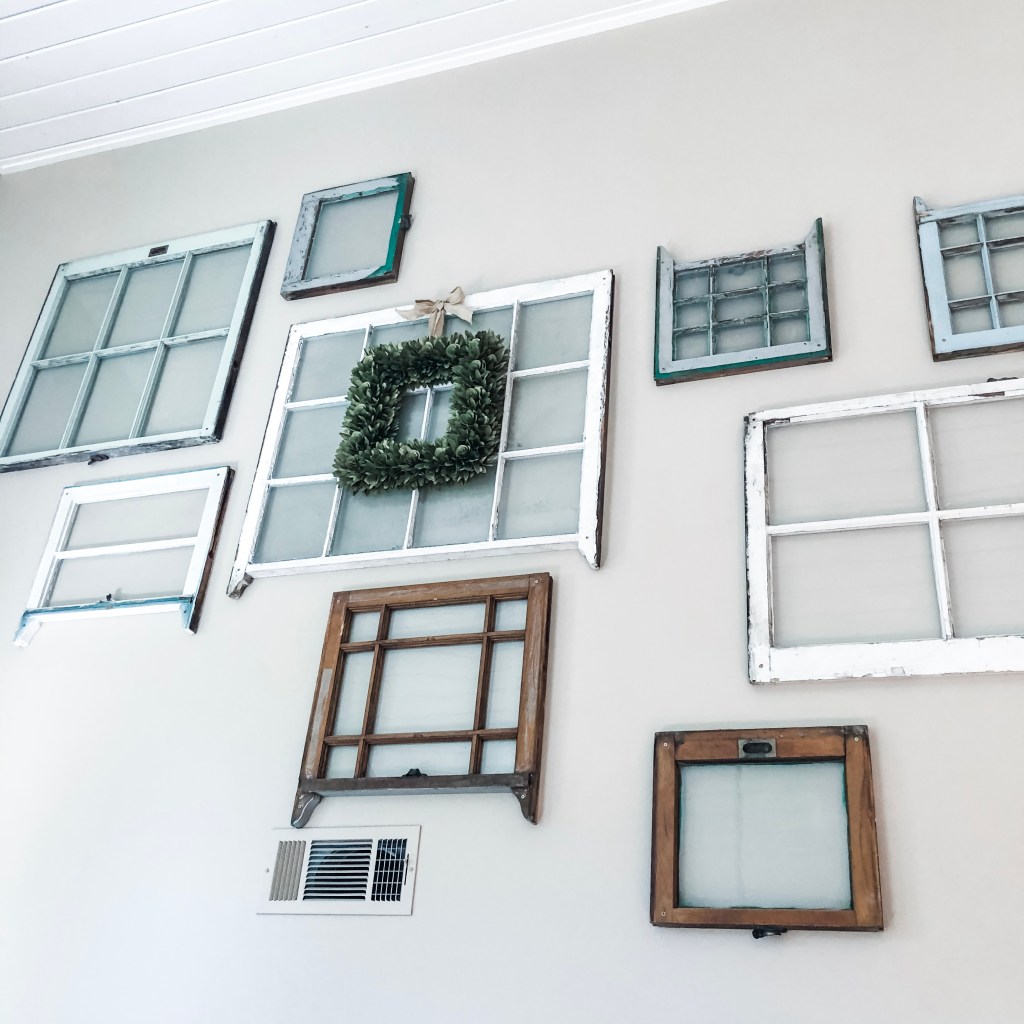
We went hunting and we were able to come up with quite a collection. I loved the idea of some old, rustic, dare I say, “dirty” windows up on that wall. A group of mismatched, paint-chipped, old and abandoned windows could find a whole new life on our wall. Once tossed and unloved, these windows would become one of my most favorite designs in our house.
Instead of cleaning up these windows, we took an old brush and just got the loose paint chips and cobwebs off of them. We weren’t interested in washing them and dealing with a huge wall of windows that would need to be touched up now and then. The rustic look is our vibe anyhow and these old pieces were going to fit in perfectly.
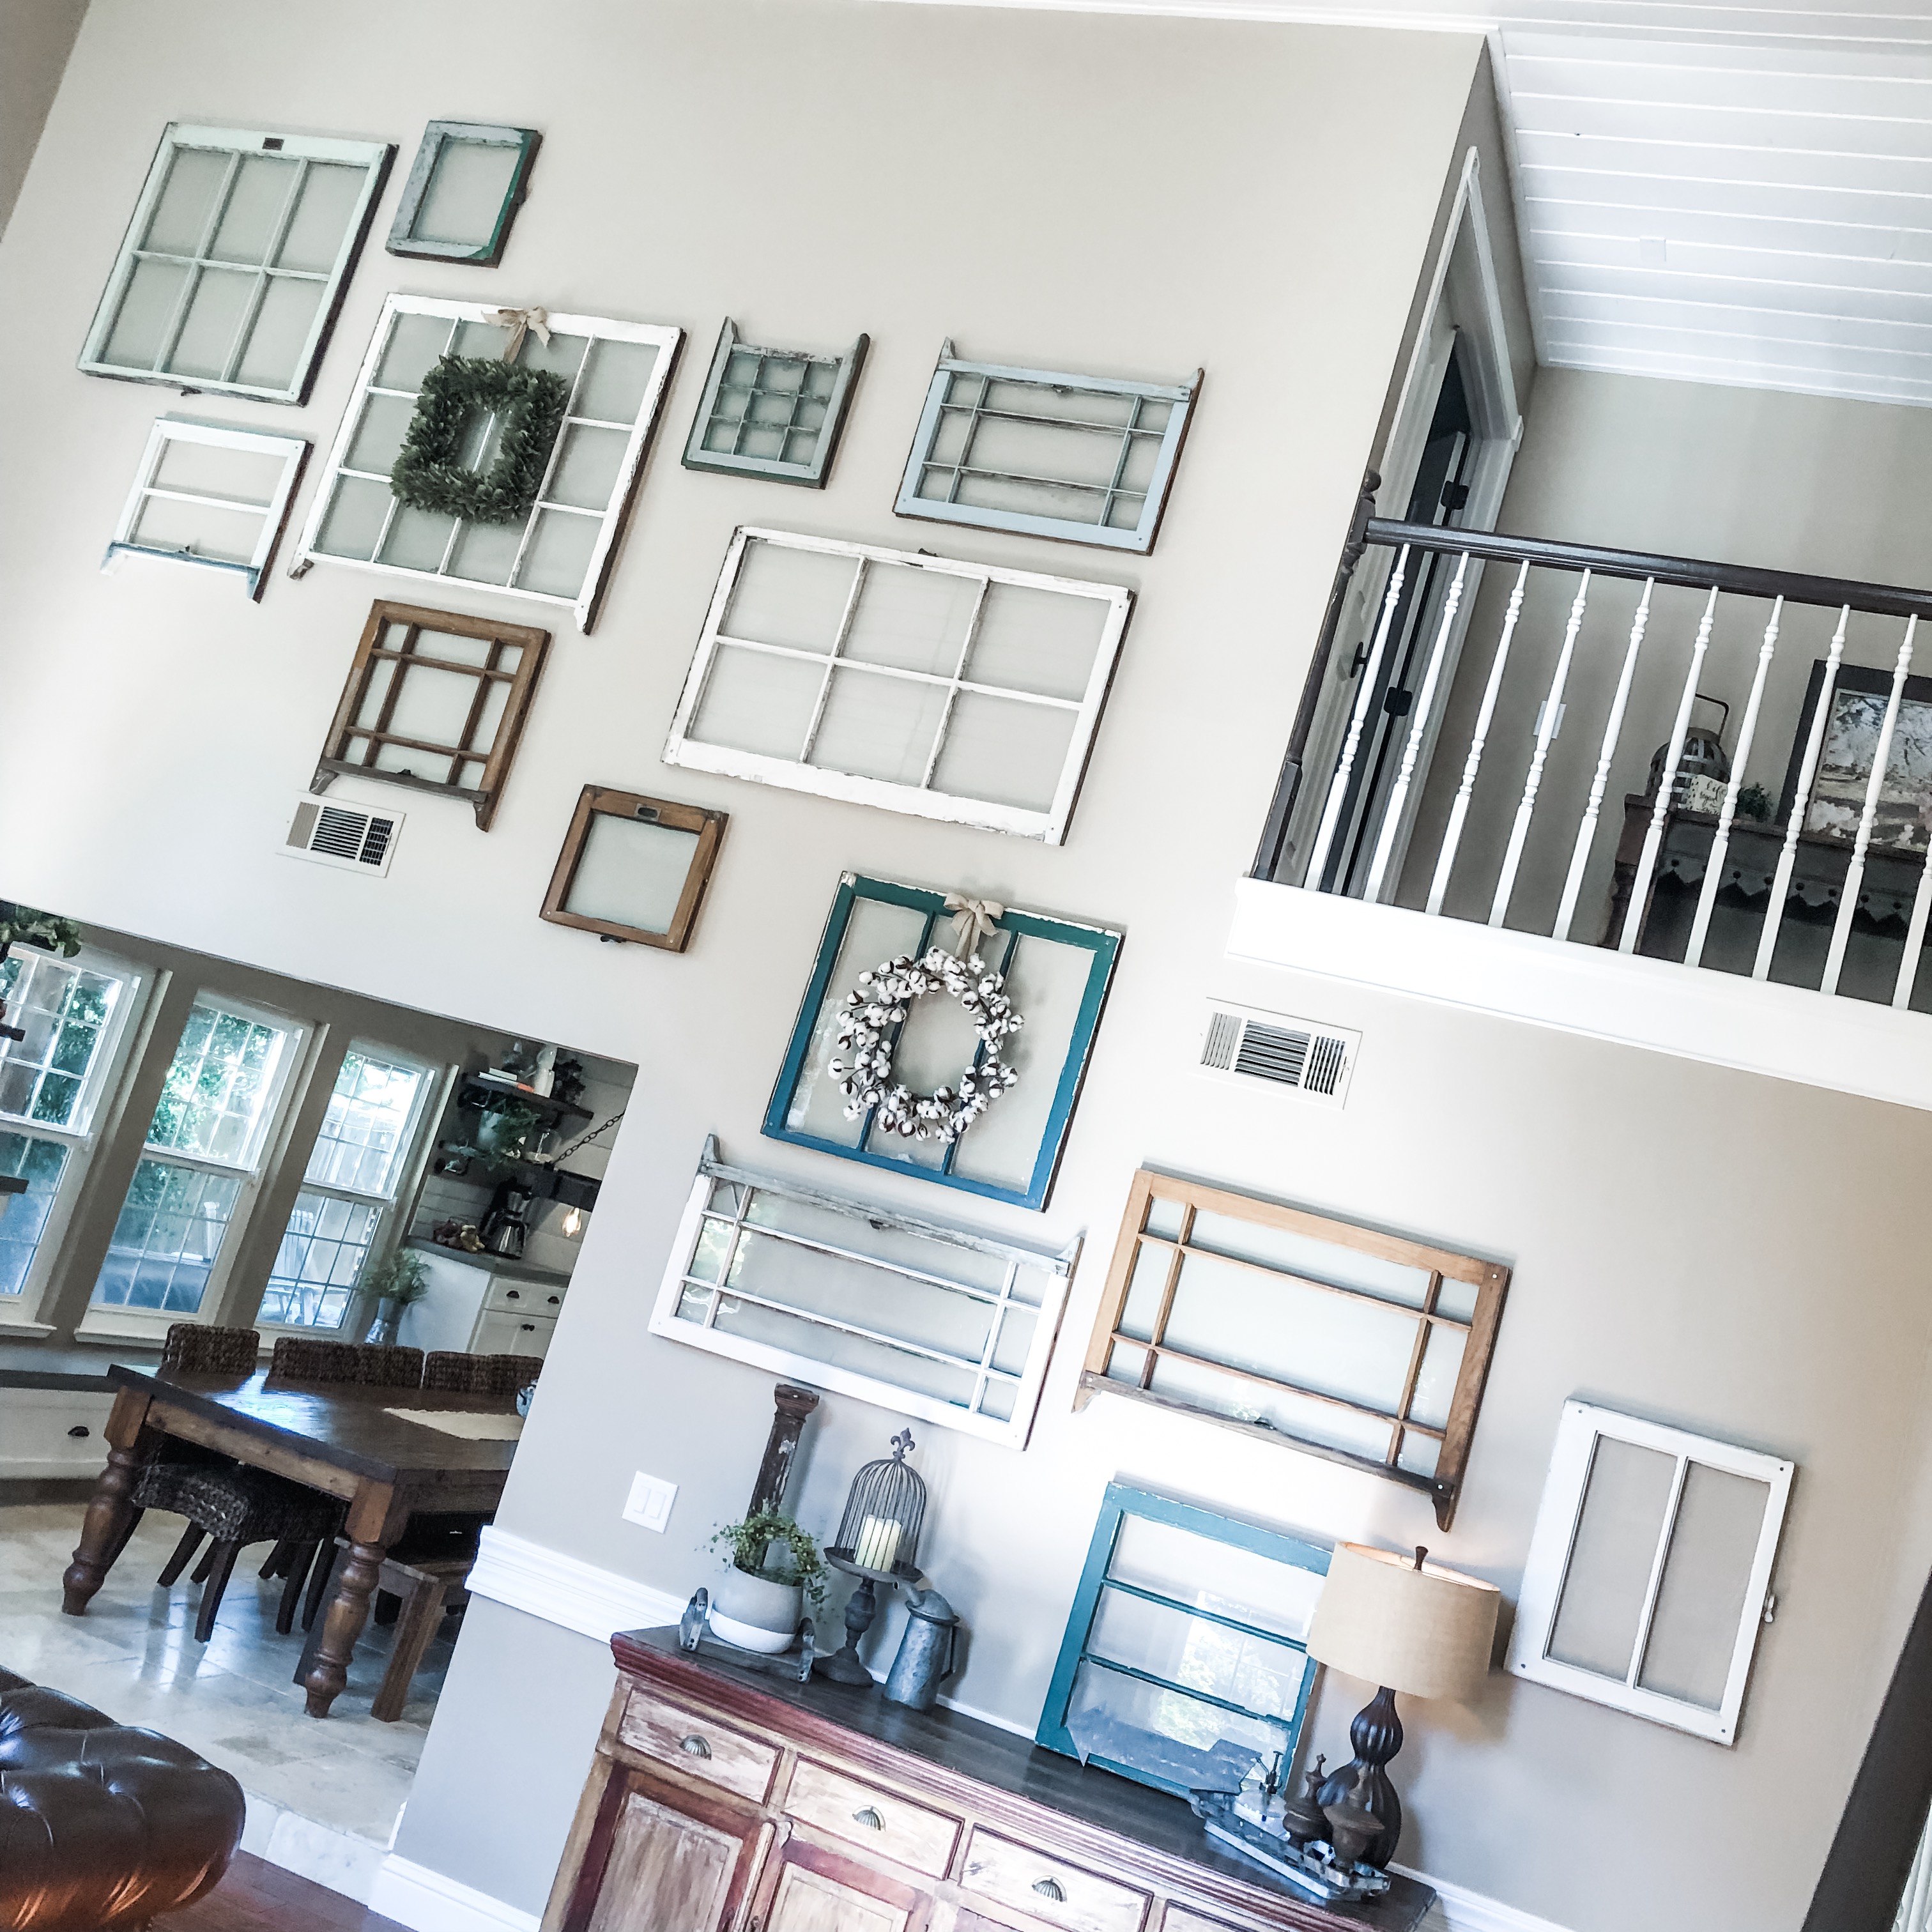
Due to the shape of the large wall, we wanted the design to make sense. We had a large door opening to work with on the lower left-hand side and stair railings to work with on the upper right-hand side. We decided that we should lay out the windows in a diagonal design so that we could use up the majority of the wall and work around our obstacles.
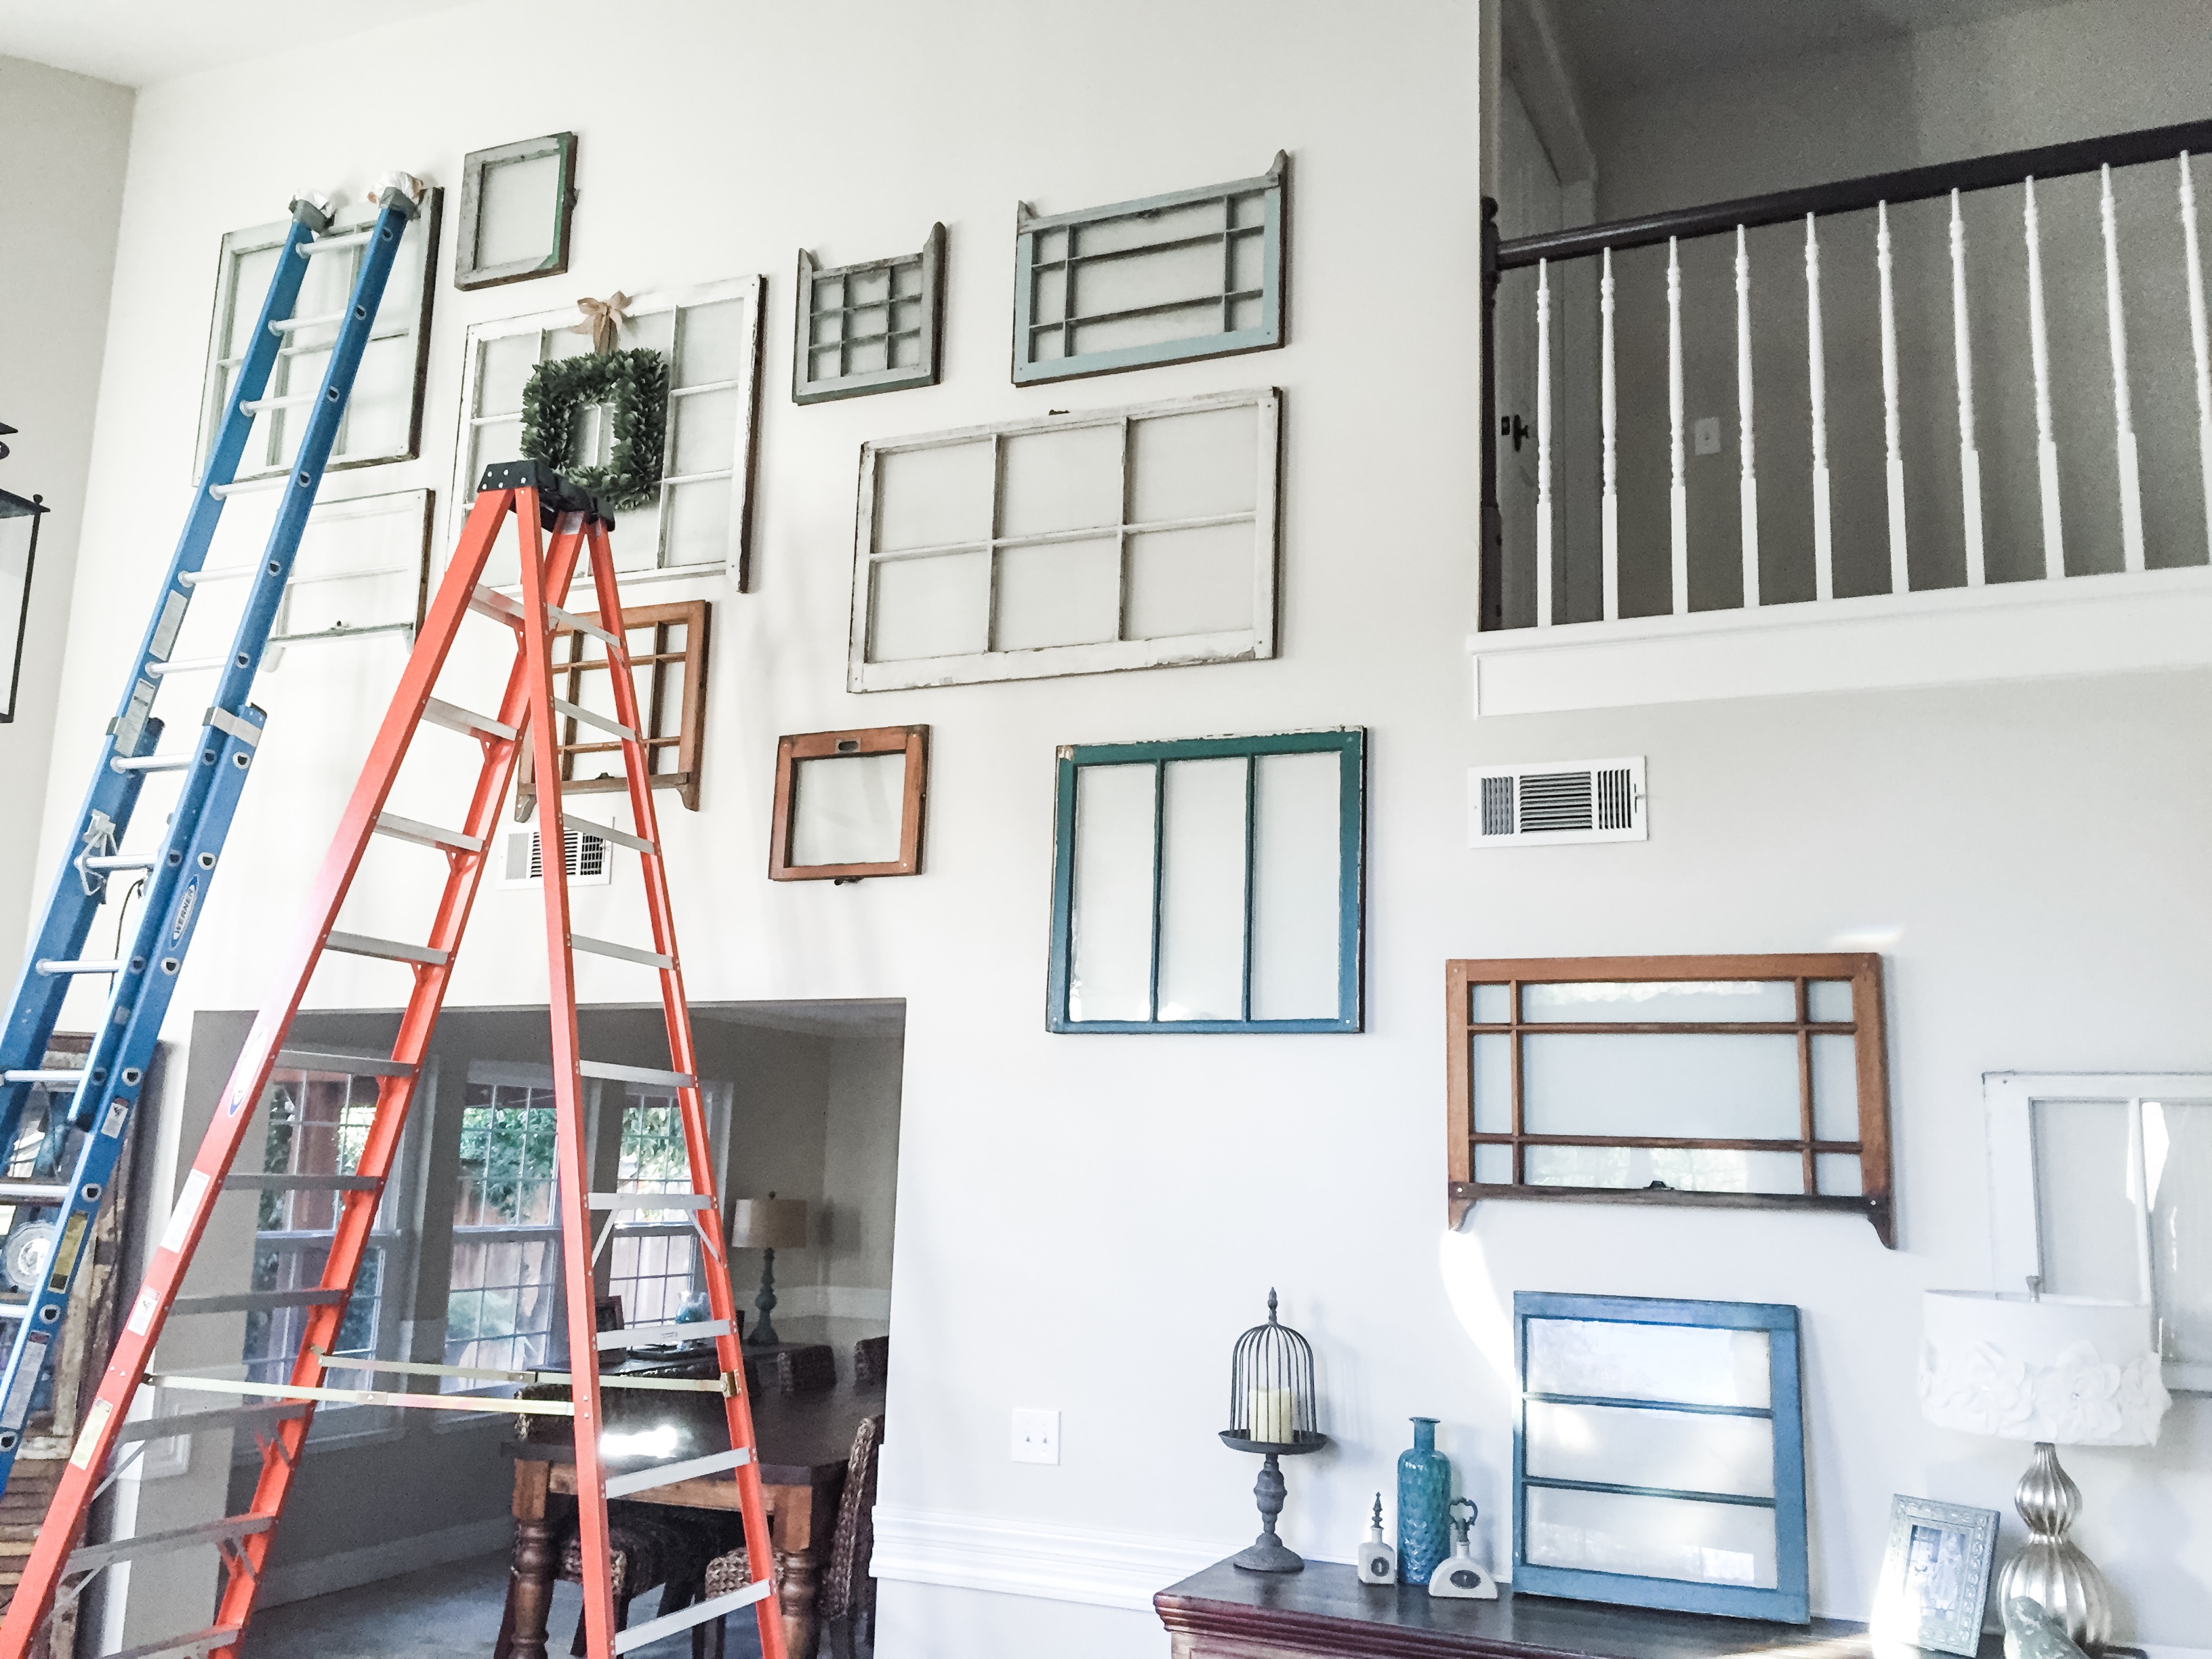
Once we had an idea of the layout, my husband and I got to work. We made sure that at least one side of each window was drilled into a stud, so that the windows were going to be secure. The last thing we wanted to do was hang up some of these super heavy windows and have them come crashing down. Not to mention, we have little ones running around and their safety is our number one priority. Kevin is good with a stud finder and he was able to find studs for all of the windows and still have the design make sense. The lower windows were no problem. He got up on a ladder and I eyeballed the layout. A few of them, I held the window to the wall, and Kev drilled into the studs. No problem!
Once we got up a little higher, that was a different story. Kevin called on his dad for a few of them and I nervously watched from below. They did an amazing job leveling the windows, and laying them out perfectly. I stood back and admired the design. It looked amazing, but it needed a little something else.
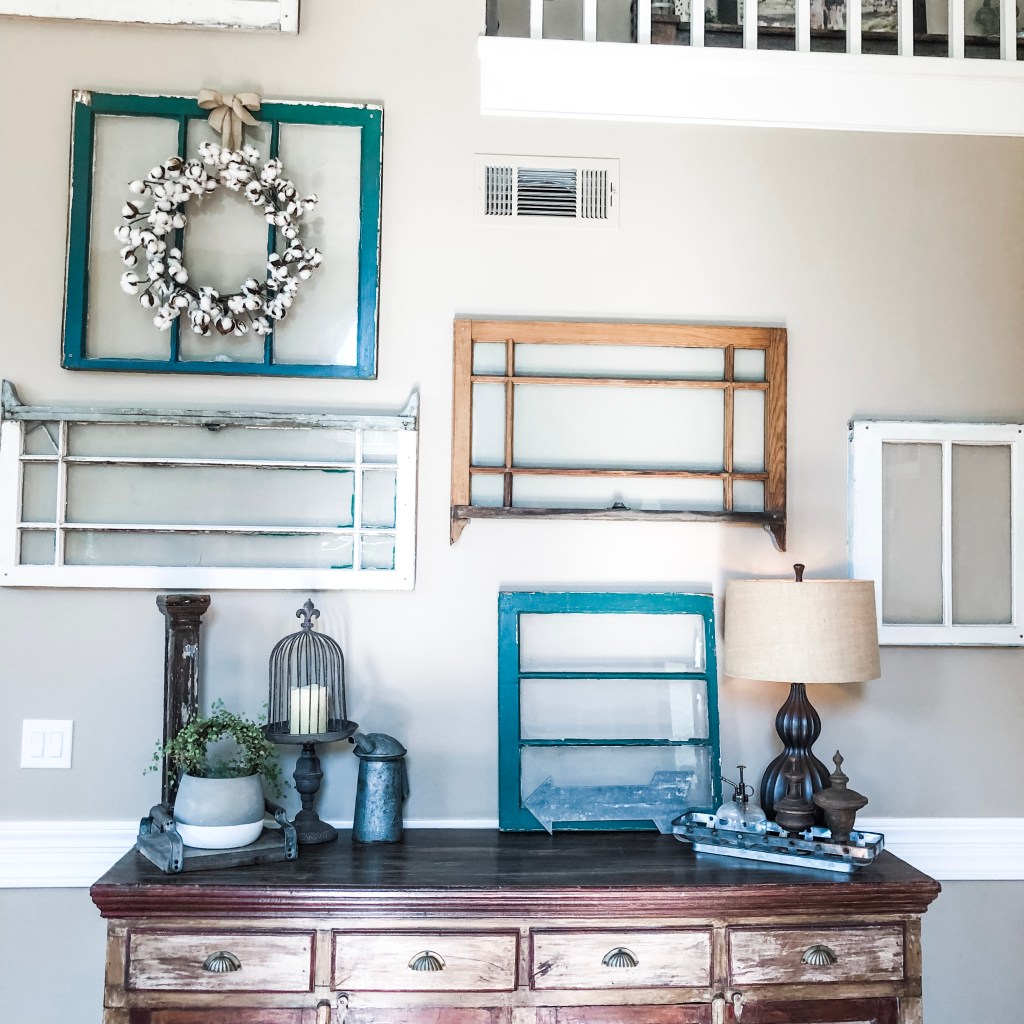
I got the idea to add a few wreaths into the mix. I didn’t want to make a collage setup with the wreaths interspersed with the windows, so we added screws to two windows and put the wreaths on the windows. I thought it would add some visual appeal and some dimension to the grouping. A little burlap ribbon and two wreaths that I already had on had, and we got the look we were going for. I added a green wood chip wreath from Pier 1 and a cotton wreath from Magnolia that I’d used in other parts of the house. It was exactly what we were going for.
We had a few leftover windows that we didn’t end up using. When we started the project, I wasn’t sure how many we would need. I’d rather have too many to choose from than not enough. I swiped one of those extra windows and leaned it up on the hutch we had underneath part of the grouping. I liked the idea of bringing the design from the top corner, all of the way down to the furniture we had on the ground. It was the perfect touch.
My decorating skills are definitely evolving and I’m growing with each project. I’ve added some additional decor to the hutch to get that rustic look I love. Three and a half years later, I still love what we’ve done. I’d call that a huge success!